Quickstart
Set up and run NativeExpress with a coding agent. For setup by hand, follow Manual setup.
Paste this into your agent, in an empty folder. It installs the starter skill,
scaffolds the project, then follows the bundled setup skill: one interview writes the
product brief, the features and integrations you do not need
come out, and the rest is configured tier by tier, each with a verification step.
What you need
- A coding agent: Claude Code , Cursor , Codex , Gemini CLI or another.
- Node.js 22.13 or later.
yarn installfails on anything older. - GitHub access to the boilerplate repository, granted when you bought it.
If cloning returns a 404 or permission error, check that your GitHub account has accepted the repository invitation and that your terminal is signed in to that account.
No Node yet? Ask your coding agent to set it up:
Set up this machine for React Native development, then create a NativeExpress app.Or install it yourself, following Tooling.
What the agent asks you
The scaffolder needs two answers: the app name and your Expo account username. The slug, URL scheme, iOS bundle identifier and Android package name are derived from them and shown once, to confirm or correct.
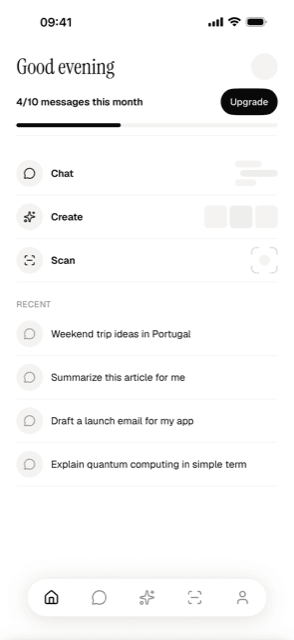
The setup skill’s discovery phase then asks six questions in one message, each with a
proposed default: what the app does and for whom, identity and platforms, which of
Chat, Create and Scan to keep, which integrations are on, how the app is monetized,
and the design inputs. The answers become PRODUCT.md, and nothing in it is asked
again.
What you still have to do
Create a Supabase account and an Expo account . Add accounts for optional integrations when you choose to enable them.
Before publishing, you also need the relevant Apple or Google Play developer account. Cloud builds for a physical iPhone also require paid Apple membership; see Tooling. Purchases need store products, and store submission needs your privacy and content-rating answers.
The setup skill covers the brief, app identity, Supabase, migrations, function secrets,
deployment, database types and the first build, then hands over to the design skill
for your theme, fonts and icon. Your agent may need you to sign in, provide
a key or complete an account step. Connected agent tools can
help with vendor configuration.
Check your progress
Run this from the project directory:
yarn skills:doctorIt reports:
- whether the product brief is written, and the feature and integration decisions it holds
- configured, partial and disabled integrations
- app identity values still set to boilerplate defaults
- the linked Supabase project, generated types and installed tools
- the linked Expo project and whether an App Store Connect API key is stored
- remote secret metadata, auth settings and EAS environments when the required credentials and CLIs are available
The remote checks can be unavailable. A configured key also does not prove that the provider accepts requests. Finish with the app check below.
You can rerun the setup skill to continue from the current configuration.
Verify
NativeExpress needs a development build, because Expo Go cannot run it. Once you have one installed:
yarn startSign up and confirm your email if required, then sign in. Send a message in the Chat tab using a free model. You should get a streaming reply. If the reply fails, follow AI troubleshooting.
Next
- Design: the theme, fonts, icon and splash from your brand
- Skills catalogue: what the skills do, and how to use them
- Docs for your agent:
llms.txtand Markdown URLs - Tooling: what you need on your machine, and when